Chapter 1 Quick Reference Guide
This page is intended to be a quick reference guide and not a subsitute for reading the appropriate sections of the manual relevant to your needs.
1.1 Most Common Issues
For a list of the currently known bugs and workarounds see the section containing known issues and most frequently asked questions.
1.2 Researcher Access
Access to the researcher areas of the site now require on campus access.
The means that you must access the site via a connection on the University of Glasgow campus, or if you are not physically on site, use the VPN to create a secure connection between your device and the university network.
You can find more information on how to use the VPN here.
1.3 Questionnaire Component Types
For more detailed information on the types of questionnaire components and the questions within see the section on mixed questionnaires in the questionnaire component types section.
| Questionnaire Type | Response Type | DV |
|---|---|---|
| Mixed Questionnaire | Multiple types of questions can be combined in a single component. | Variable by question type. See each questionnaire type for more information. |
| Radiopage | Multiple questions asked across a single radio button response scale | Numeric value which is not seen by participants that corresponds to text labels which are seen by participants. Can incorporate automatic reverse-scoring. |
| Rank Order | A list of options which are dragged into relative rank order by participants. | Rank position assigned by participants of the various items. |
| Info | None | None |
1.4 Experiment Component Types
For more detailed information on the types of experimental components please see the full section on experimental component types.
| Experiment Type | Response Type | DV |
|---|---|---|
| 2AFC | Alternative forced-choice with 2 options. | Binary, defaulted to 0 or 1 assigned depending on how you assign the stimuli to trials. |
| 2-AFC with 8 button strength of choice | Alternative forced-choice between two stimuli, but with the addition of strength of preference for the choice made on an 8-point scale. | Out of 8, with 0-3 indicating strength of choice in one direction for one piece of stimuli and 4-7 indicating strength of choice in the other direction for the other piece of stimuli. |
| Labelled Buttons | Display 1, 2 or 3 stimuli items and participants respond on a scale set by the researcher. Akin to a Likert scale. | A numerical value corresponding to the values set by the researcher. |
| Slider | A sliding scale between two numerical points where the number is not displayed to participants. | Numerical, between upper and lower bounds and at increments set by the researcher. |
| X-AFC | Alternative forced-choice with more than 2 options. Participants pick only one. | DV is a number which corresponds to the column the chosen stimuli item is assigned to on the stimuli assignment page, ranging from 1 to X. |
| Sorting | Participants put stimuli in order of some specified preference by dragging them into position on the screen | Number of times participants changed the order and the order the stimuli was placed in. Also provides stimuli original order of presentation. |
| Slideshow | Timed display of stimuli items where participants are only asked to watch, with no data collected or rendered. Usually used as a precursor to another component. | None. |
1.5 Structuring Your Study
Sets and projects are used for structuring and delivering your project.
1.5.1 Sets
Sets create the internal structure of your study using a combination of grouping of questionnaire and experimental components and decision rules which move participants between them. You must place individual components within at least one set before placing them in a project, as the set arrangement determines order of presentation of components.
For more information see the sets section of this site.
1.5.2 Projects
Projects are the final “container” for the supersets, sets and individual components that you have made. This allows for the study to be presented to the participants. Here, you will assign a URL suffix that will allow your participants to access the study.
Projects do not allow for the automatic filtering of participants, as server-side calculations are not possible, however they may allow for simple branching based on participants self-selection into sets within the project.
For more information see the projects section of the site.
1.6 Testing Your Study
You must test your study before you ask your supervisor to make it live.
For more information please see the section with recommendations on how to test your study and the student checklist before you ask your supervisor to activate your study.
1.7 Activating Projects
For students, contact your supervisor to have your project activated. Autonomous researchers and PGR students who have been given full researcher accounts can activate their own projects.
Instructions for activating projects can be found in the section for supervisors.
You must ensure that your study works as expected before asking your supervisor to activate it. See the student checklist for things to check before requesting this.
Once a study is activated it cannot be edited without resetting it back to “test” status, essentially deactivating it.
When you attempt to edit an active item this warning is displayed at the top of the page next to the “Save” button:

If you make a change to the study after activation, rendering it inactive, the supervisor remains the point of contact to reactivate it. You may wish to check that the edits made have not impacted the validity or quality of the project, or how comparable data before and after the changes are.
1.8 Anonymous Participation
It is possible for participants to take part in your studies anonymously, even those who need to be assigned participation credits.
Please see the sections on participation and participation credits for more information on how this works.
1.9 Favourites/Pinned Items
You can add frequently used items to your favourite’s menu to help you find them more quickly. This is done by navigating to the appropriate section of the page depending on what item you want to add to your favourites.
Find the item that you want to add to your favourites and click on the circle next to it under the column header “Favs”:

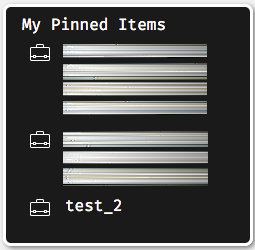
The next time that you go to the researcher’s page you will see a menu on the left-hand side of the page called “My Pinned Items” that contains the items you have labelled as favs: